
I finished hand sewing together all the blocks for my Mischief Quit! I started the quilt in June of 2017. The fabric was gift from my mom for my birthday and the pattern was a Mother’s Day gift from my husband. I met my goal of having the block assembled in less than a year by mere days, but it still counts!! (If you’d like to try this quilt kit you can buy it here.)
Now comes the next big step: appliqueing on the borders. I have never done anything like this before. So it will come as no surprise I spent a lot of time on the internet. Then I read Flossie Teacakes’s Guide to English Paper Piecing. Lastly, Karen Tripp, the DIY Addict herself, shared a photo of my quilt top on her Instagram page and asked people for advice.
I now had mountains of information and needed to get on with it. I figured there are four borders to attach so I have four tries to figure out what technique works the best for me. As it turns out, I did something different with each borders. Yay for being a beginner. 🙄
Attempt #1
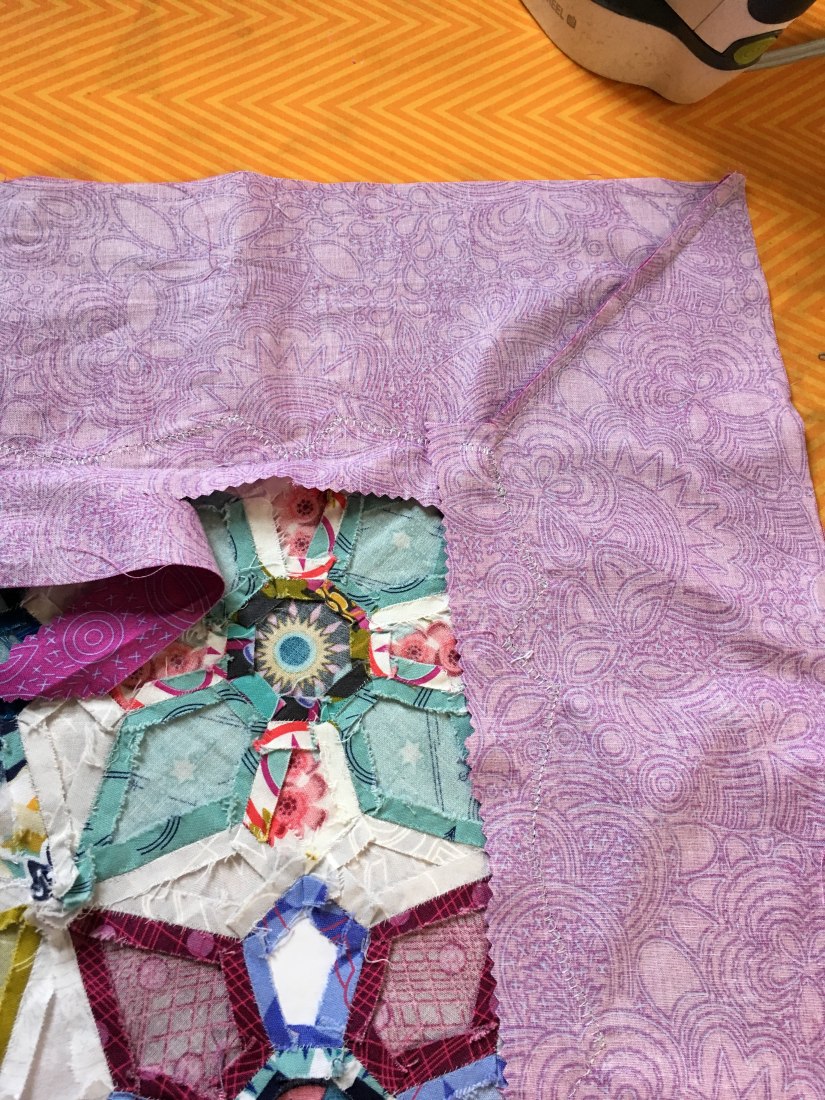
One of the Instagrammers shared that she left the end paper pieces in and machine sewed right through them. This was my ideal since I was afraid of removing the edge pieces and distorting that beautiful pattern in Karen’s design. I used a Hera marking tool to mark the border fabric.
See the line? It means no markings to remove later. 🙂

Next I pressed the edges and applied the applique glue. I was immediately concerned that the glue’s hold wasn’t strong enough so I added pins. I sewed right through the papers and got beautiful crisp edges…then I tried to take the papers out and it was a DISASTER. I destroyed the papers, which I was bummed about because I already have plans for a repeat, AND I don’t think I was able to get all the paper out.
Conclusion: be brave and take the paper’s out first.
Attempt #2
I took the papers out, pressed the fabric and secured the fabric with pins this time. It went okay but the fabric felt a little shifty to me. AND a few of my corners rounded a bit after taking the papers out. I did not like that.

Conclusion: Better pinning is needed and need a way to preserve edges without paper.
Attempt #3
For this attempt, I pressed the edge while the papers were still in to crisp up the borders and then I took the papers out and pressed AGAIN with a bit of Best Press. This left me with nice pretty edges. I decided to give the glue another chances…and the second half came unglued while sewing. I had to stop to realign the fabric and pin. I felt grumpy about that.

Conclusion: Pressing before removing the papers makes a big difference and the glue is not enough.
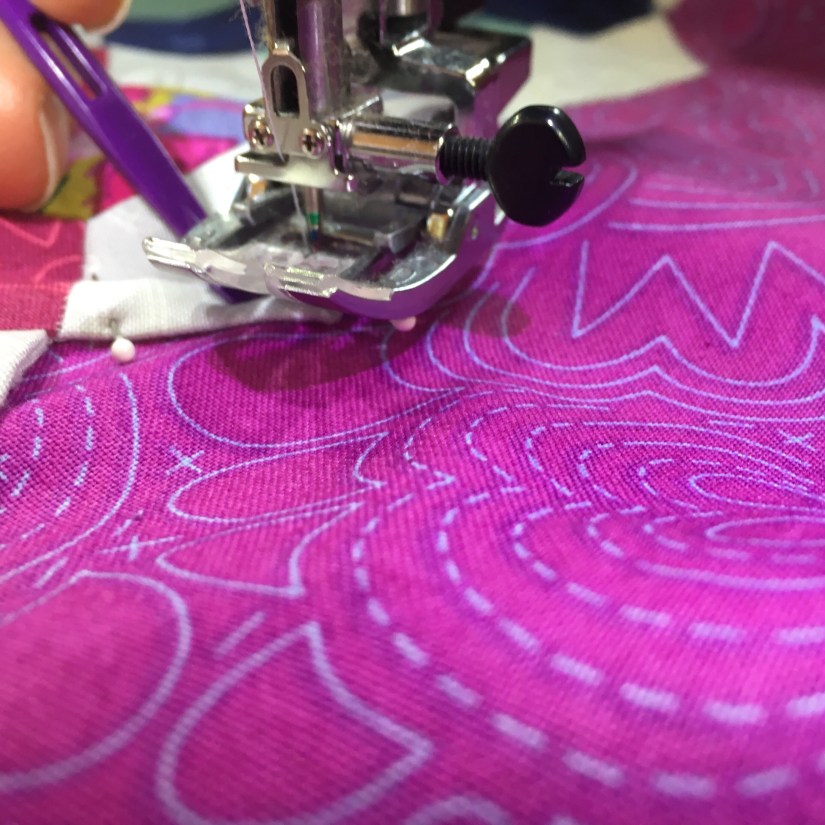
Attempt #4
Taking in everything I learned, I pressed the edges with the papers still in. Then I removed the papers and pressed again with the Best Press.
Before Best Press:
 After Best Press:
  Then I glued the borders and then let it sit under heavy stuff all day to make sure it set

And I added a few pins just to be sure.
Conclusion: I still had some shifting problems. I don’t think I pinned frequently enough. I’m chalking this up to being a beginning. I think I’ll need to practice some more.
Mitering the Corners
I used Angela Walter’s framework for mitering my borders. You can check out her episode of the Midnight Quilt Show (skip to about 7 minutes in).

After I sewed the corners, I went around the corners to make sure everything we super tacked down and wasn’t going to move. Then I trimmed some of the bulk from the seam allowance.
I’d love say that I used pinking shears for a super strategic reason. The truth is I was afraid to use the rotary cutter because I didn’t want to cut something I wasn’t supposed to and my fabric scissors were in the other room and I did not want to go get them.
A few side notes:
I love my “purple thang” tool. It is amazing for popping out papers and for tucking in fabric tails while sewing. It costs hardly anything and is super helpful.
I had to remind myself over and over again that I am a beginner. I have NEVER done this before so the results will reflect my novice status. As we tell our OCD clients All. The. Time: done is better than perfect. When a cold Illinois winter hits and I’m snuggled under this quilt feeling super proud of myself, I’m not going to notice those few bits of paper I wasn’t able to pull out or that corners didn’t miter exactly.
Enjoy!

Mandy this is such a beautiful quilt! You did me proud 😃😃😃 thank you so much for taking the time to write this too.