quilting

Fussy Cutting

Some of the coolest blocks I’ve seen for #100Days100Blocks are fussy cut or meticulously cut. This can mean a couple of things but for the sake of this post let’s focus on cutting your fabric in such a way that when you sew the fabric back together you recreate the pattern. Like this:

img_1754

This year for #100Days100Blocks2018 I really want to hone my skills, and I thought I’d show you my process. Obviously step one is to pick the block. I’m working on block 28 from Tula Pink’s City Sampler Book. Here it is:

img_1683

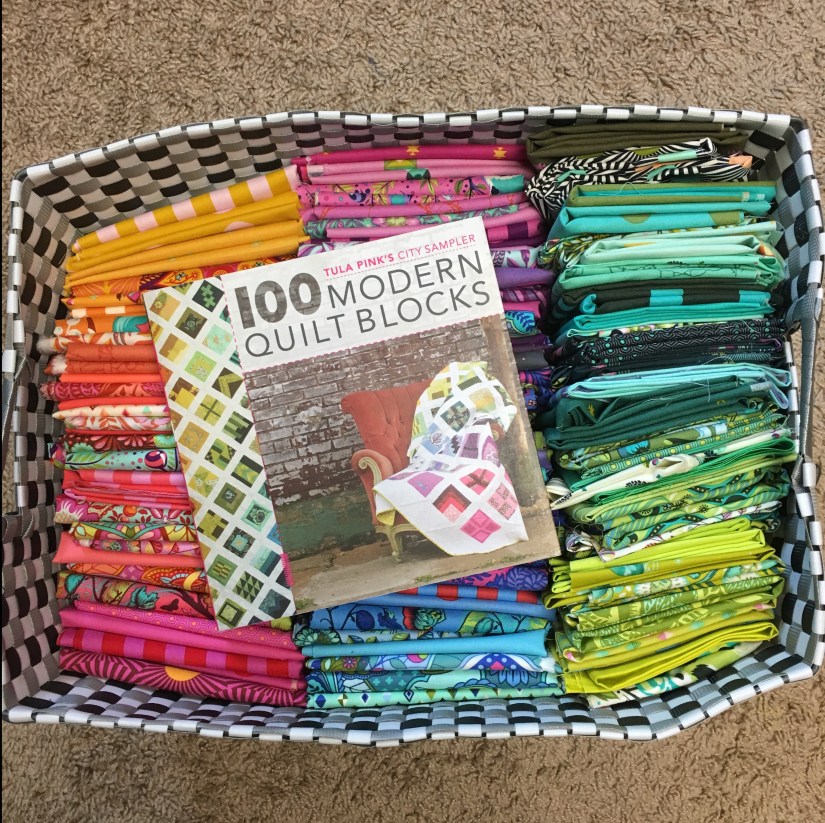
Here is my fabric pull:

img_1689.jpg

My plan is to recreate the raccoon on the right side of the block, put a strip in the middle and use the solid for the left. This means, I need three pieces of raccoon fabric to line up.

I start by picking what I think of as the “anchor piece”. It’s the piece of the block I’m going to build off. In this case I’m going to start by cutting the bottom piece and then work my way up.

img_1684.jpg

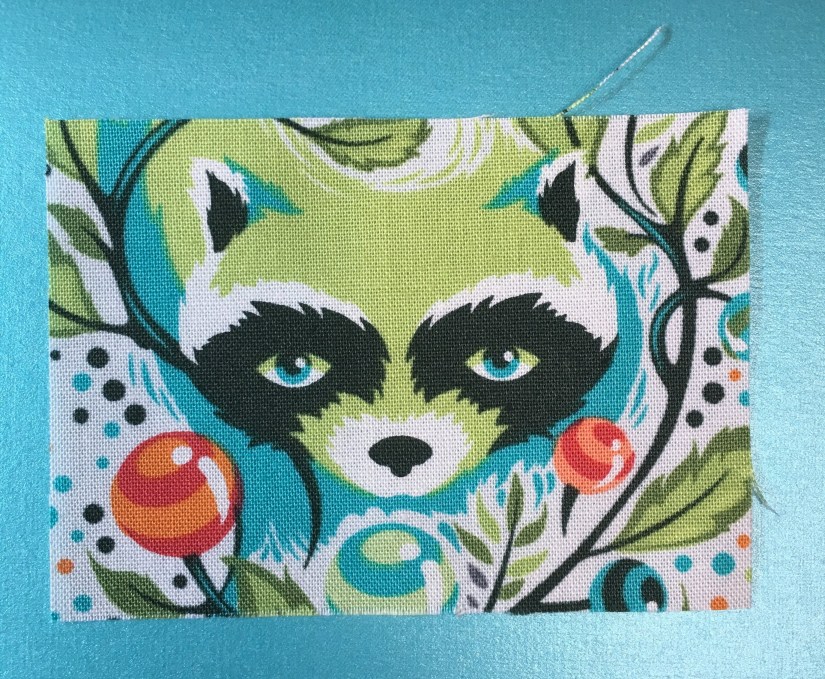
Next I lay the piece I just cut over the fabric and match the pattern.

img_1849
The pins point to some of the places that I matched the pattern such as the stems of leaves and raccoon fur.

It’s time to cut the fabric! First identify seam you want to match. In the picture below that is labeled with an “A.” Next, identify the side that is going to match the edge of the block. In the picture below that is labeled as side “B.”

img_1850
You’ll notice I did not work too hard to match the pattern on the bottom of the piece. The seam isn’t going to match here, so it’s not that important.

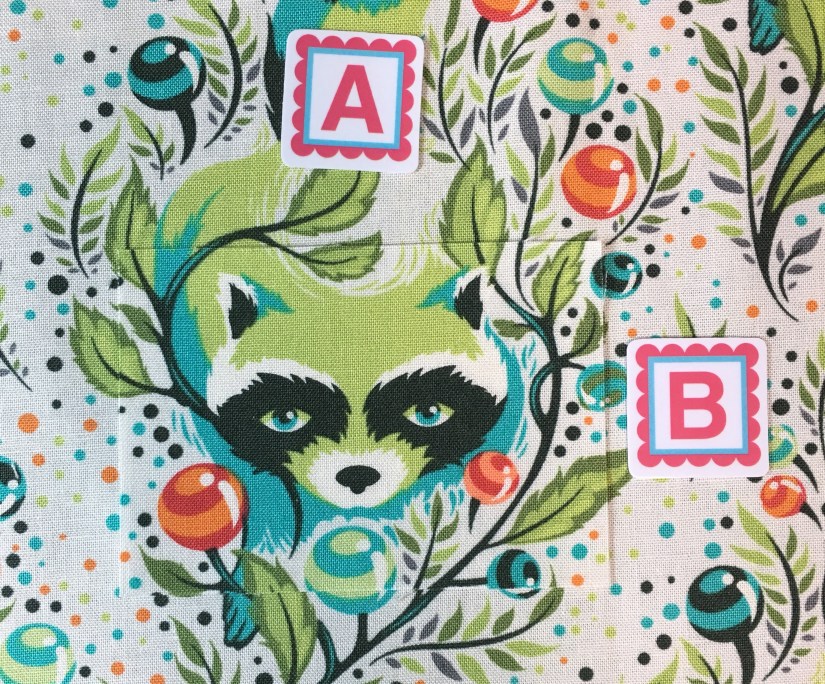
When you are fussy cutting your seam allowance is 1/2 inch of the total size you’re cutting. Let’s say the piece you were cutting was 1.5 in by 3.5 in (that isn’t what you would cut for this block, but I do not have permission to disclose details of the patterns so we’re making stuff up.) This means when you’re cutting you will overlap your side “A” fabric by .5 inches.

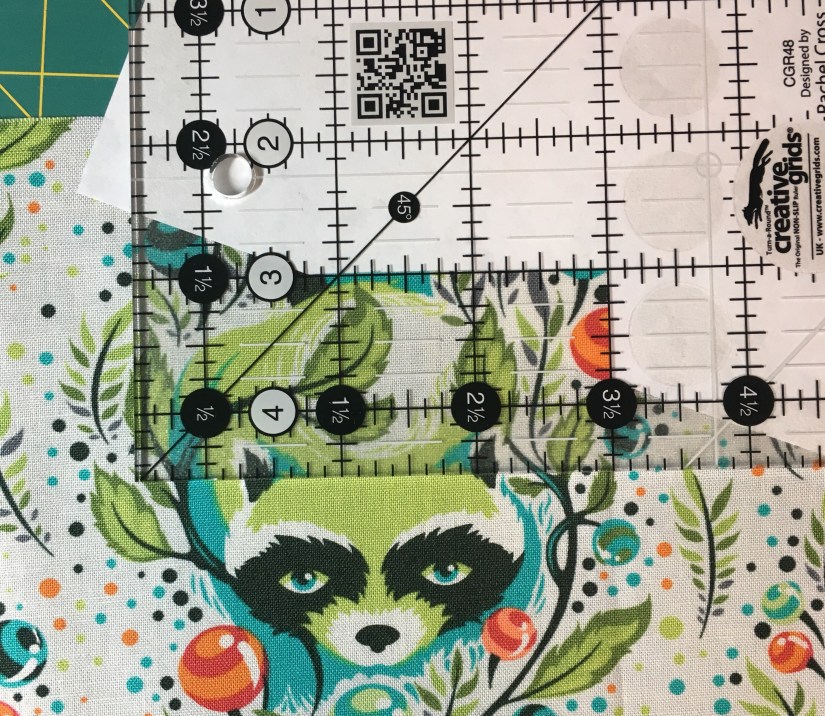
Next it’s time to line up your ruler. I line the ruler flush against side “B” and then 1/2 down on side “A.” Then I cut 1.5 inches down on the “B” side and 3.5 inches across on the “A” side.

img_1855
I used washi tape to mark where the edge of the anchor piece meets the fabric I’m cutting.  Since it’s really hard to see.

You can see below the cut extends down a half inch below the anchor piece.

img_1851

At this point, I remove the anchor piece and put a piece of paper under the corner I already cut. This helps me line the ruler up with the corner so I can cut the other two sides.

img_1852

After I’m done cutting I set out the pieces.

img_1690

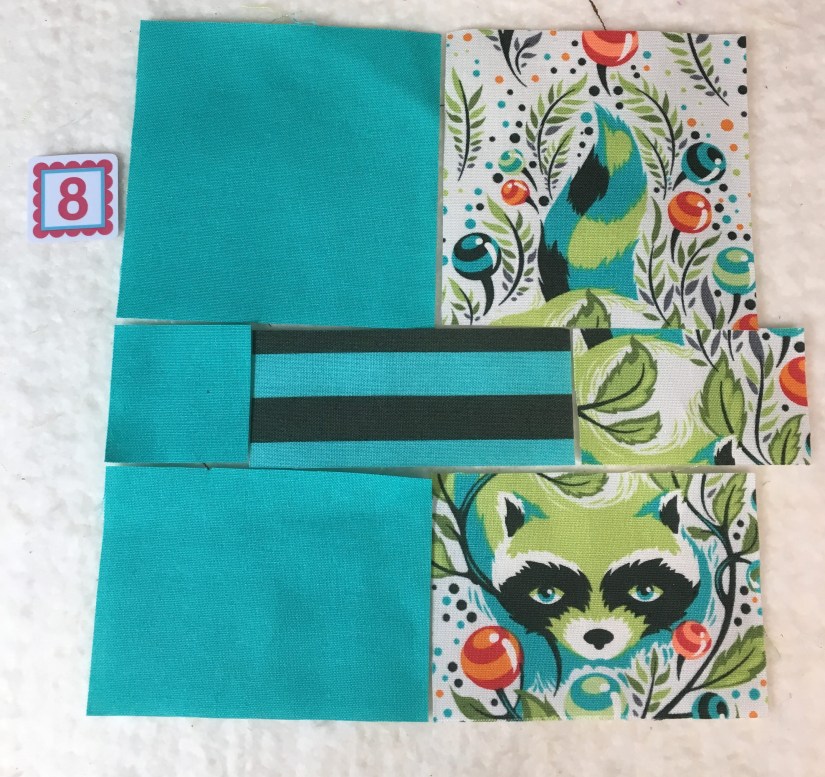
At this stage I often feel a little nervous because the fabric doesn’t look like it will ever match. But as you can see below, it will

img_1692.jpg

Another trick, I use a quarter inch presser foot that is a quarter inch on both sides of the foot. In this block, it doesn’t matter if the blue fabric lines up exactly, so I want any fabric shifting to be absorbed by the blue. Therefore, I run what I am trying to match through the machine first.

img_1693

I try not to obsess about if the pattern looks lined up while I’m sewing and focus on trusting my cutting and lining up the edges. After I’m done, there is a good press with starch and then it’s done!

img_1697

A word about perfectionism: I have a three rips rule. If my seams don’t still line up after trying three times I either need to re-cut my pieces or let it go. You’ll notice that ears and leaf to the left line up much better than the ear on the right. At the end of the day, I’m not making a show quilt. No one will notice the leaf being one stitch off, but they will notice the overall effect of the block. Finished is ALWAYS better than perfect! 🙂

Another note: I recently watch GeekyBobbin do an Instagram live in which she recommended starching your fabric (are you following her on wordpress or instagram? You should be.). It’s making my process MUCH easier. She also recommends glue basting which I have not been able to get to work for me. That goes to show that all methods don’t work for all quilters and you must find what fits you.

Happy fussy cutting!

mental health, quilting

From Beginner to Expert

My first block for #100Days100Blocks2018 was a legit stunner. I am still surprised that I did that. And many of you asked how. I am not an expert quilter, yet. My real area of expertise is in mental health.  So I thought I would share my thought approach to quilting, specifically developing a growth mindset.

Dr. Carol Dweck of mindsetworks.com coined the terms “growth mindset” and “fixed mindset.” She defines a growth mindset as, “The understanding that abilities and intelligence can be developed.” A fixed mindset views abilities and intelligence as permanent.

A growth mindset looks at the various skills involved in quilting (selecting fabric, piecing, basting, quilting, hand sewing) and asks, “How I can get better?” A fixed mindset assumes how things are is how they will be. A growth mindset believes people developed skills by learning. A fixed mindset assumes a person came by their skills naturally, without much effort.

One of the mistakes we make when comparing our work to another person’s work is assuming that person achieved that work with ease. My first block  for 100Days had to be re-cut right away because I forgot to to allow for the double seam allowance needed for fussy cutting. Then I had to rip and re-sew many times to get the center to line up. When all was said and done, I probably invested two hours into making that block. I struggled to execute my vision. None of that struggle is obvious from the photo.

In her book Grit, Angela Duckworth talking about improving a skill through deliberate practice. First, identify a stretch goal, something outside your current comfort zone. Work relentlessly towards that goal until you achieve it and get feedback on the process from others who are better than you.

My stretch goals for 100Days this year are:

  1. Improve fabric selection, especially mixing color and patterns
  2. Improve my fussy cutting skills
  3. Increase the precision of my piecing.

I also have a way to measure each of these:

  1. overall visual impact of the block, feedback it generates online, how many patterns, colors, fabric types did I use and did that work?
  2. how well the seams line up, is the selected image properly centered in the block
  3. Are my seams straight, is the finished block the correct size, do seams match where they are meant to?

To prove that I wasn’t always this good a picking fabric, behold two of my disaster blocks from last year:

img_3751

I hated how block nine came out so much that I re-did it with a solid pink in the middle. Block 43 I also hated, but I left it to remind myself I’m learning. You can see that even my block photography needed work.

Here is the lesson I was learning about fabric selection last year: there is a difference between blender patterns and focal patterns. Your eye needs space to rest on a block and blenders give your eye rest. My fabric pull last year was almost exclusively focal fabrics and solids. None of the patterns worked well as blenders. This is the reason I had such a hard time mixing patterns…they didn’t mix!

For this year, I’m using Tula Pink fabric, and I have blender fabrics. I’m noticing that I’m using those fabrics the most because they bring the block together. For example, I’m using the tortoise shell fabric Tula Pink’s Slow and Steady collection a lot.

img_1704
Notice how every fabric choice has a pattern but the block doesn’t look too busy.

One of the things I enjoy about declaring this quilt about improving skills and learning is that it gives me freedom to play. Here’s an example of something I tried that did NOT work.

img_1659

There is something wrong with these colors, and I can’t explain what it is…I’m still learning about color…I can say that I look at this block and think, “Gross!” So it didn’t make it into the quilt. Oh well and on to try again.

I also want to clarify between honing skills and falling into perfectionism. For example, I recently ripped and re-sewed a block because my seams did not nest exactly. They weren’t that far off:

img_1671

I didn’t rip and resew because I needed to be perfect. I ripped and resewed because I’m experimenting with pinning vs no pinning and different methods of pinning. I wasn’t satisfied with one method, and I wanted to try again. My third goal is to increase the precision of my piecing which I cannot do I do not try and improve my technique. I’m asking myself, “Can I do better?”

I also have a three rip rule. If I can’t get it right after three rips and resews, time to leave it as is or make a big change.

Here’s an example of choosing done over perfect: In this block I chose matching fussy cutting/pattern over nesting seams.

img_1672

What is the skill you are trying to improve? Once you figure it out,  decide how you’re going to measure it and follow makers who do a better job than you do. Ask people for feedback.

Try, Fail, and Try Again. This is how experts are made. It’s hours alone in your sewing space. Over and over until you figure out what works for you. Then you get to show the masterpiece on Instagram, creating the illusion that you create with ease.

Let’s get practicing!

Project Status, quilting

How I sew my blocks for #100Days100Blocks2018

The countdown is on! We are on our way to the start of another 100Days100Blocks challenge. I love this project! I have so much fun sewing along with all the other quilters. Since this quilt-a-long is such a marathon, I thought I’d share my process with you.

First, I sew ahead. I would not be able to manage this pace otherwise.

I start by putting all the fabrics I’m using in one spot so I can pull fabric for multiple blocks at the same time.

img_1380-1.jpg

I usually pick a focal fabric (in this case Prince Charming), and then look for accent colors in the print. I set the blocks together how I envision it working and then take a picture so I don’t forget what I had in mind when I actually go to cut fabric.

img_1542

Next I put the fabric in bags with one of my alphabities blocks, so I don’t forget which block I was pulling fabric for (notice a theme of me forgetting things sometimes?).

img_1545

After I cut the fabric I lay it all out on a piece of batting so I can see it all together. I also work at least two blocks at a time. Having two blocks going means I can chain piece.

img_1555

Here’s how I have my sewing area set up: I bought a press and flip cutting mat. It has a cutting mat on one side and a pressing mat on the other. I also have a tiny iron. I set up the pressing mat and iron on the side of my sewing table. I place the batting on the floor to my left. I press and then realign the blocks.

img_1558

img_1557

Using the batting and pressing right next to my sewing machine minimizes that chance that I mix up pieces. I did that a ton last year and ripping seams is a pain! I also keep the alphabities piece over the block so as to not mix things up.

The process then become a lot of sew, press, repeat until…Ta Da! A finished block.

img_1564

Hope that was helpful. Happy stitching!